WSL2 is a great solution for Linux users who work on Windows, but it also comes with many downsides. Today we will solve one of the WSL2 problems: memory shortage.
Performance issues with WSL2
WSL2 consumes a lot of RAM while running. Combined with Windows itself, I often run out of RAM after opening a few browser tabs, Visual Studio Code, and WSL2, even if my laptop has 16GB of RAM.
What is zram?
zram is a Linux kernel module for creating a compressed block device in RAM (Arch wiki). In short, it greatly increases your available RAM, and the trade-off is higher CPU usage because it will continuously compress and decompress data in your RAM.
Why can’t I use zram directly in WSL2?
Because Microsoft doesn’t include it in WSL2’s kernel (according to this answer). Or did they?
Get your own kernel and modules
If you don’t know what WSL2 is or how to install it, check this out. From now on, I assume that you are familiar with WSL2. Let’s find out how to make Linux modules work with WSL2.
- Install the build dependencies in WSL2 (I use Debian btw):
sudo apt install build-essential flex bison dwarves libssl-dev libelf-dev bc
-
Navigate to WSL2 official GitHub page and grab the latest release (other kernels won’t work; I have already tried using the official Linux kernel).
-
Decompress it, and it will give you a folder like
WSL2-Linux-Kernel-linux-msft-wsl-x.xx.xxx. Change the directory to that folder. -
Enable the zram module and its dependencies (learn more at
drivers/block/zram/Kconfig) in the config fileMicrosoft/config-wsl. It’s recommended to use a GUI (open withmake menuconfig), but I couldn’t find the zram module anywhere in that menu, so I wrote the changes to the config file directly. It still magically kept my config (if it is valid). In short, change the following lines inMicrosoft/config-wsl:
## Following lines already exist; modify them from `is not set` to `=y`.
CONFIG_CRYPTO_LZO=y
CONFIG_CRYPTO_842=y
CONFIG_CRYPTO_LZ4=y
CONFIG_CRYPTO_LZ4HC=y
CONFIG_CRYPTO_ZSTD=y
CONFIG_ZSMALLOC=y
## Add this line to the end of the file
CONFIG_ZRAM=m
- Compile kernel modules with all cores available. If you don’t want to use all of your cores, remove or change
-j $(nproc):
make -j $(nproc) KCONFIG_CONFIG=Microsoft/config-wsl modules
Note: I set every option to default when prompted.
- Compile your kernel:
make -j $(nproc) KCONFIG_CONFIG=Microsoft/config-wsl
It will create a file named bzImage.
-
Copy the
bzImagefile to the Windows partition (if it hasn’t already been). -
Configure WSL2 to run with the newly compiled kernel (read this for more information):
- Edit or create a file named
.wslconfigat%USERPROFILE% - Add
kernel=C:\\temp\\myCustomKernelto the file - Shut down WSL2 with
wsl --shutdown
- Reopen a WSL2 terminal to start it
- Install the kernel modules from the
WSL2-Linux-Kernel-linux-msft-wsl-x.xx.xxxfolder:
sudo make -j $(nproc) KCONFIG_CONFIG=Microsoft/config-wsl modules_install
-
(Optional) Check your zram module with the
modinfocommand. It will give you module information if it is available; otherwise, it will tell you that the module was not found.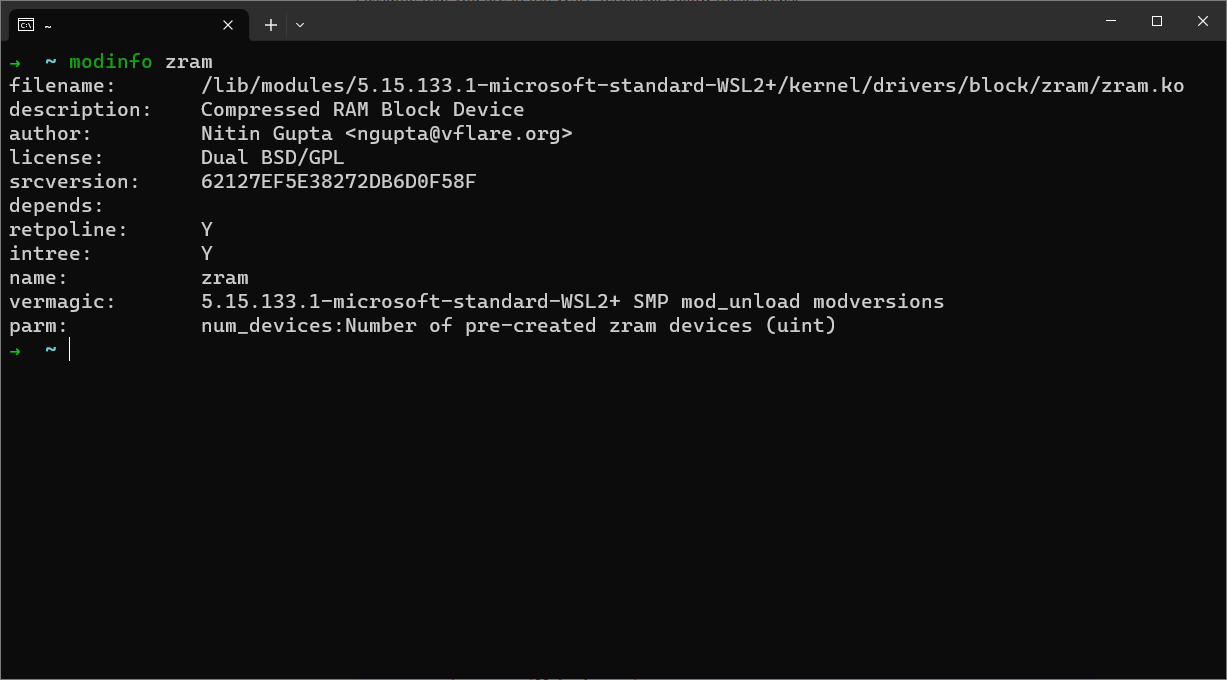
-
Activate your zram module. If you don’t know how to activate it, navigate to this link or blindly run the following commands with sudo permission:
modprobe zram
zramctl /dev/zram0 --algorithm zstd --size 32G
mkswap -U clear /dev/zram0
swapon --priority 100 /dev/zram0
Testing what we have done
I wrote a very tedious script in Golang to allocate around 16GB of RAM as follows:
package main

import "fmt"

func main() {
 const TOTAL_BYTES_ALLOCATED = 16 * 1000 * 1000
 tmp := make([]byte, TOTAL_BYTES_ALLOCATED)
 for i := 0; i < TOTAL_BYTES_ALLOCATED; i++ {
  tmp[i] = byte(i)
 }
 fmt.Println("press any key to exit . . . ")
 fmt.Scanln()
}
The script took 16GB of RAM as expected, and about 15GB of it was stored in zram. But does it affect our Windows host?
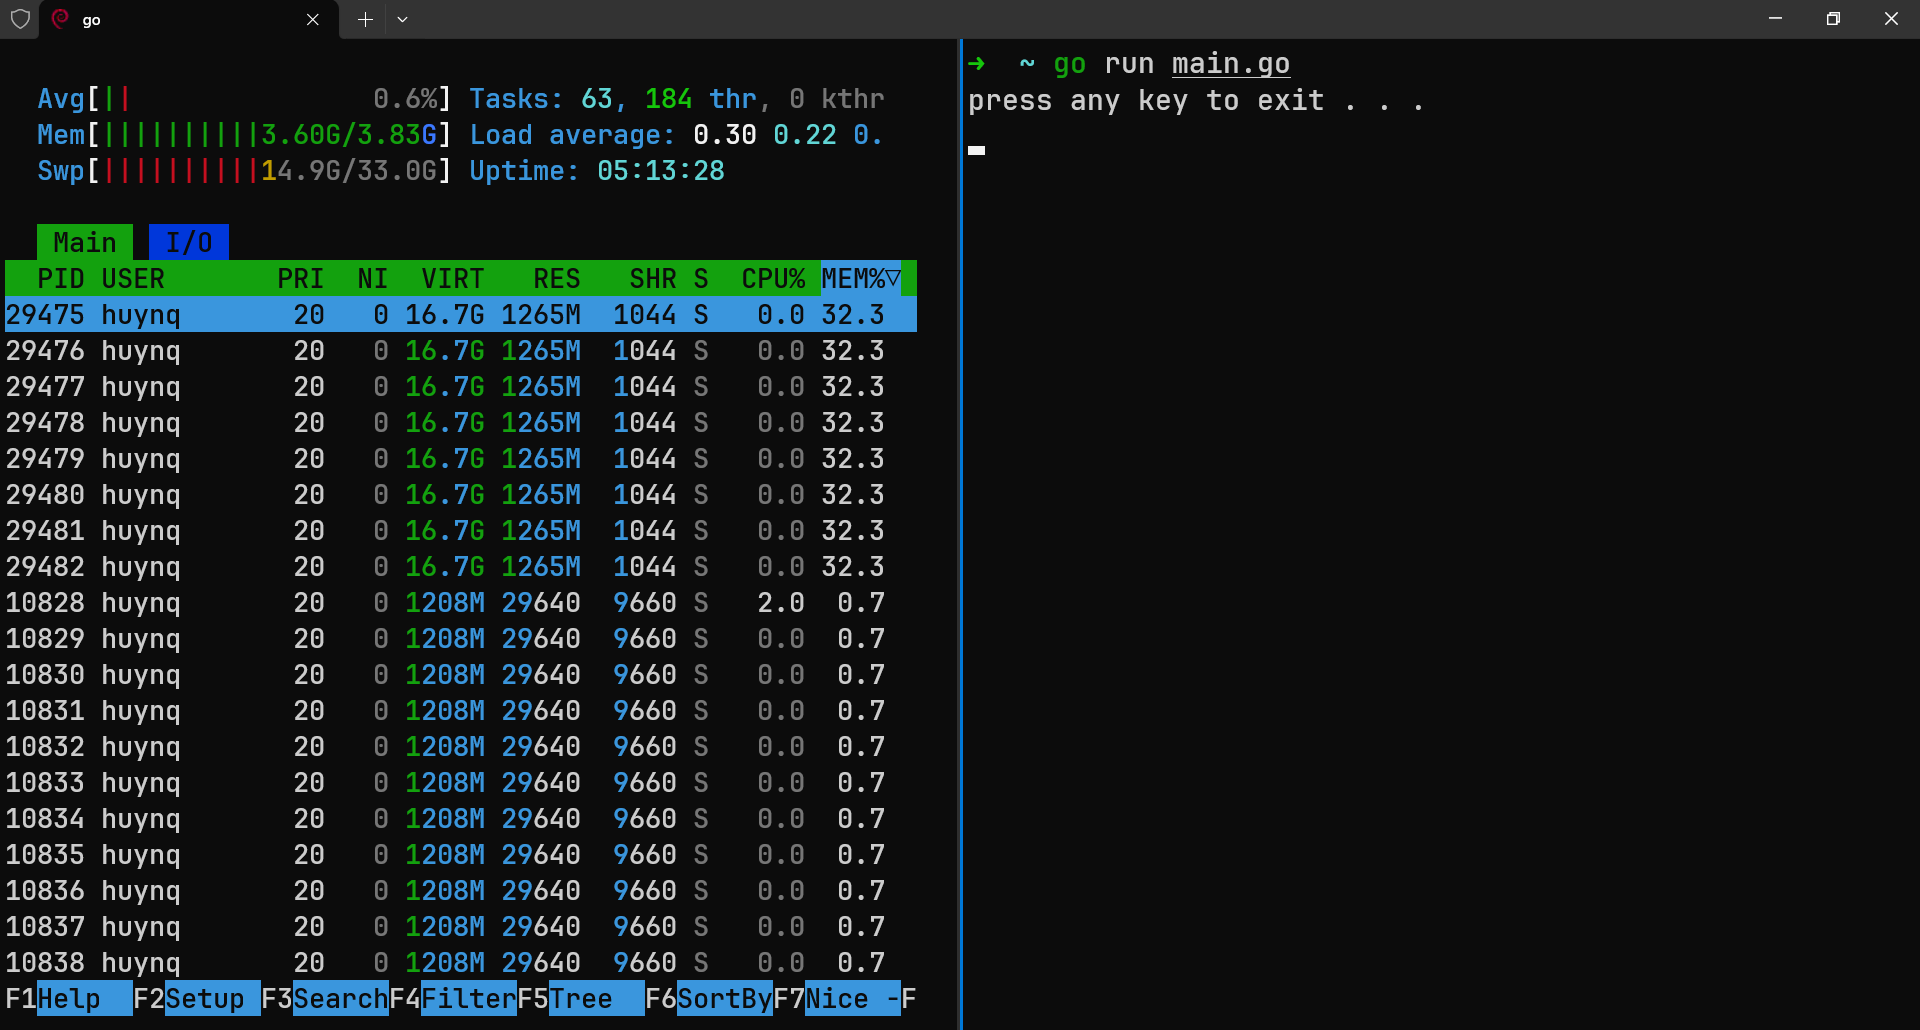
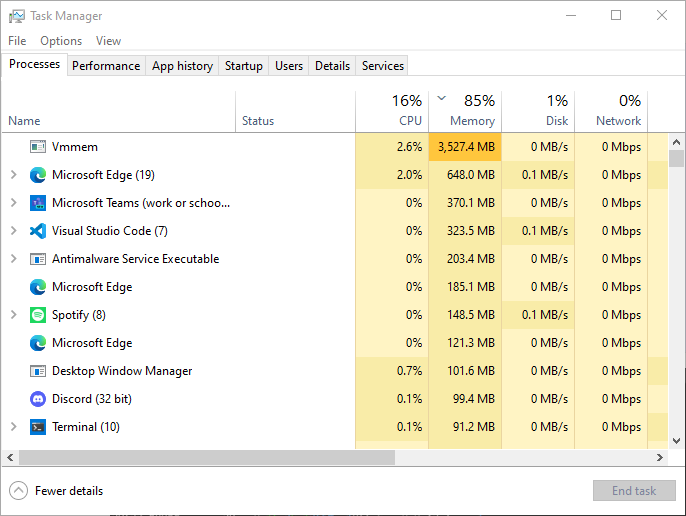
The answer is no. I allocated only 4GB for WSL2, and it seemed happy with what I gave it.
Conclusion
zram is a very convenient way to overcome the RAM shortage problem with a few trade-offs. But WSL2 doesn’t come with any Linux modules, so we can’t take advantage of it directly. The solution is to recompile the kernel and install modules for WSL2 as shown above. Good luck to you guys who are reading this, and good luck to me in the future.